One of the fun parts of Small Disc Golf is that anyone can design their own discs and print them on a 3D printer. The standards for SDG flying discs are much more flexible than for regular golf discs. In general discs should not be heavy enough to cause damage to people or things. The SDG disc standards don’t constrain the shape: just the diameter, thickness (top to bottom) and weight. They can be printed in any material with any skin thickness (thickness of plastic in any one place).
But, 3D printing discs can be a challenge because the obvious orientations for printing do not work very well without a lot of support material which is wasteful and can be difficult to remove. Printing discs parallel to the print bed also results in ugly “topologiocal maps” on the top of the disc where the curves become nearly horizontal.
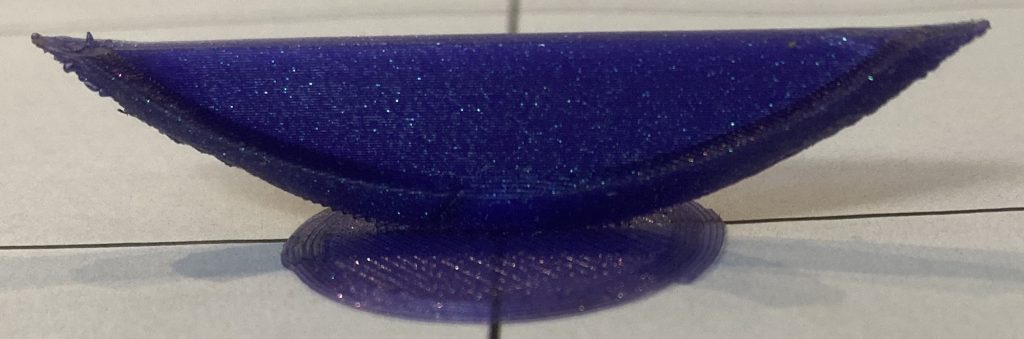
Printing them on their edge works much better for faithfully reproducing the continuous curves of a disc while almost entirely avoiding the need for support material.
Discs have a narrow edge so they need a raft to provide enough surface area so that the print will not break free. The raft that the slicer offered didn’t work very well so I added a cylinder 20 or 25mm in diameter and 0.5 mm thick to the bottom edge of the disc models. This break off after the print is finished and the rough edge can be sanded smooth to yield a smooth, round disc.
The .step files for the discs below now all have a “print base” which is that thin disc that helps keep the disc solid.
Of course SDG discs can be injection molded, vacuum formed, CNC milled or even hand-made. The only restriction is the size and weight. The material with which they are made is up to you.
The rest of this appendix is specifically about 3D printing of SDG discs.
All of my printing is done on a Prusa Mk3S+. I use mostly Overture PLA but I also use a rainbow silk PLA from Locyfens.
Disc Orientation
Discs are easiest to 3D print on their edge. Printing on their bottom or top requires supports that are difficult to remove, increase print time and waste material. But printing on an edge requires a support raft and brim.
Because the disc is on edge, the force applied to it by the extruder moving and depositing melted filament increases as the disc gets taller and taller. Near the end of the print the extruder has a lot of leverage, so even if it exerts only a little force it is magnified and can cause a brim to separate from the platen. Even if the brim doesn’t fully separate, if the disc wobbles or moves while it is being printed it will ruin the symmetry and regularity of the disc, rendering it mostly useless for small disc golf.
If you see the disc moving in the Y axis while it is printing, or if the base breaks free or is wobbling, you should stop the print because it isn’t going to work.
For a 75mm disc a raft 0.5mm thick and 20 or more mm in diameter is sufficient. To that add a brim that is 10mm wide and has no gap.
No other supports should be needed – the shape of the disc allows the printer to bridge the small gap at the top of the disc as it is being printed.
It is important to orient the disc so that the motion of the printbed is minimized. On a Prusa 3D printer Z is up, X is left and right, and Y moves the table forward/backward. The disc must be oriented so that it is largest in the X-Z plane. The Y plane should be the thinnest so that the print bed only needs to move a little bit to print the disc. If the print bed moved a lot its acceleration would apply more force to the print which might cause it to break free.

Brim and Print Base
I tried to use a raft, but it completely did not help A raft ends up under the disc and that is really not much better than printing it directly on the print bed, because the edge of the disc has a very small tangency to the raft.
Instead, the print base is like a raft but it actually intersects the disc by a few layers (between 0.4 and 0.66mm of overlap in my models).
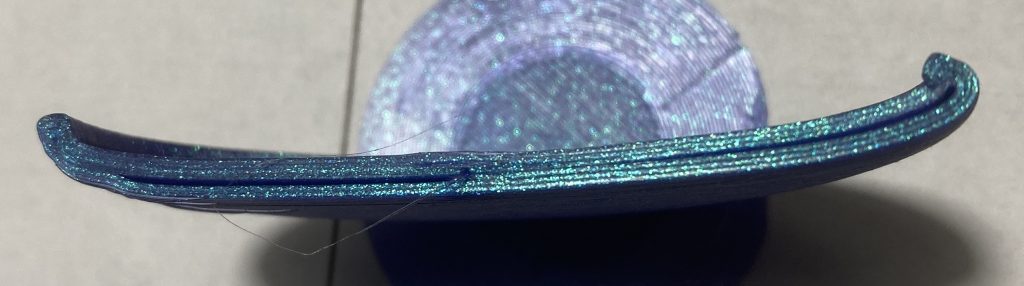
I started with 0.5mm overlap and it worked for some filaments but not others. The problem is that depending on the filament, it might need a more durable print base to prevent it from breaking loose during the print. When the print base is too thin the disc can flex back and forth a little. It ends up causing the top of the disc as it is printing to be a curve and not exactly straight across:
The left and rightmost extreme edges are curving upward in the photo above. It isn’t extruding too much at the ends, it is pushing the print downward a little bit with each new layer. After a few dozen layers the difference has accumulated to a noticable amount – equivalent to a couple layers. The problem gets worse and worse because of leverage. The only thing pushing against the pressure of the extruder when it encounters the raised edge is the print base.
The curves increase little by little and the force on the print base increases with it. Eventually the print base begins to break free. The brim probably holds it in place but the print is ruined and will never result in a usable disc. You might as well stop it as soon as you see the disc rocking back and forth or side to side.
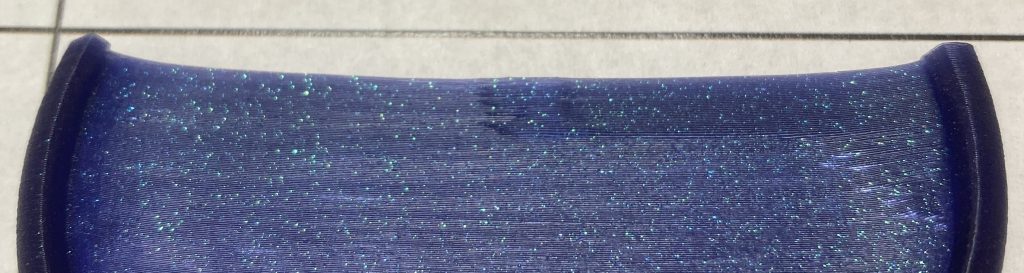
When it moves the layers drift resulting in misprinted discs:
I found that silk filaments are more elastomeric (stretchy) and they need a thicker print base, even though it means you have to cut the print base away. If you try to bend and break a thick print base it will break the disc.
Whether you are able to break off a thin print base or whether you cut off a thick print base, some of the print base is still connected to the disc. I call the tiny portion flash. The outermost layer of flash has a completely flat face because it was on the print bed.
The flash ends right where the edge of the disc should have been, which means when you sand away the flash you should not sand the very center of the flat part any more than necessary to form a smooth curve. When the flash is sanded off the disc should should be circular and no flash should remain.
No one print base thickness is correct for all kinds of PLA, so the disc library provides .step files and .3mf for discs in three standard print base thicknesses:
- 0.4mm print base for regular PLA
- 0.5mm print base for regular and silk PLA
- 0.66mm print base for more elastomeric silk PLA
You might need to use a thicker print base for a thin-edged disc like the Sabre but you might get away with a thinner one for other discs with wider edges.
Slicing
Here is a disc after it has been sliced. This one has both a brim and a raft. The print base is 0.5 mm thick. The brim is one layer thick:

You can see the brim in dark green with the light green around it. The print base has orange sides and red fill on top, under the disc. It overlaps the disc. The rest of the disc doesn’t need supports and adding them will make it harder to get a smooth flying disc.
The very first layers of the disc print are crucial. It might seem like the first layers of the disc itself are not exactly flat at the ends – they might seem to curl upward slightly. The extruder should push them down when it adds the next layers. If it doesn’t, and the upward curl remains or gets bigger you probably need to try the next thicker print base.
Perhaps surprisingly, the overhang angle can be extremely high at the bottom of a disc and it doesn’t prevent the disc from printing. There could be some artifacts at the very bottom of the disc in the first dozen or so layers, and there could be other artifacts at the top edge of the brim (I call them fangs), on the underside where it forms a bridge near the top. These can be sanded and/or carved smooth.
It is important to use thin layers. Discs print well with a layer height of 0.15mm. Thicker layers, such as for a draft print, may not work as well (or even at all) at the bottom of the disc because the angle of overlap is extreme there. Thinner layers overlap less because they are still the same width and despite the angle the actual amount of overlap is small compared to the width of a layer. If your printer is capable of finer resolution that might work even better.
Important Slicer Settings
I print my discs on a Prusa Mk3S+ printer using Overture PLA filament. I use the Prusa Slicer to prepare my discs for printing.
My first discs worked well enough but sometimes they had very fine “hair” all over them. The example below is about the worst. I was trying all kinds of different slicer settings to figure out how to stop this from happening and some of those attempts made it worse.
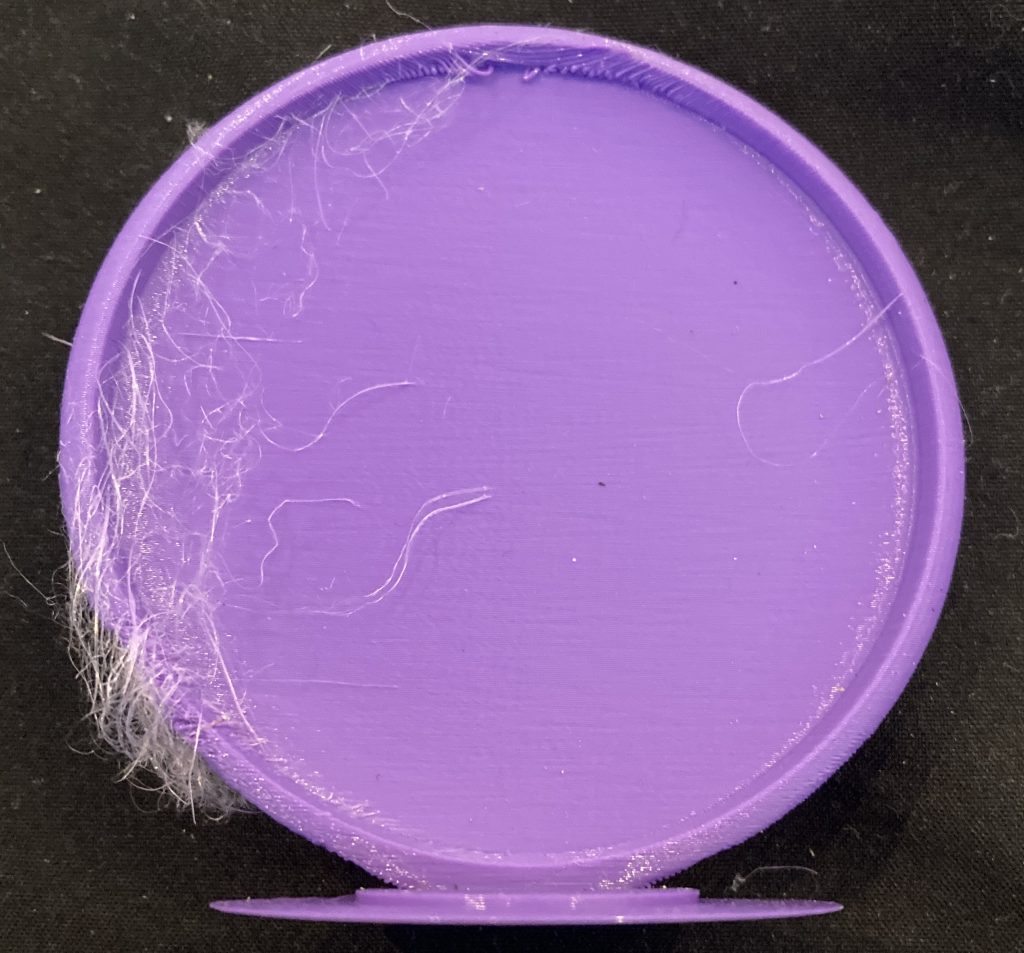
The effect is called “stringing” and there are different ways to address it based on what is causing it. After many experiments I found that there is a simple way to avoid stringing on small golf discs.
These are the changes I make in the Prusa Slicer:
- Print Settings
- Layers and perimeters
- Layer height 0.15
- Perimeters 4
- Avoid crossing perimeters
- Infill
- Infil 0%
- Skirt and brim
- Brim width 10mm
- Brim separation gap
- Layers and perimeters
- Filament Settings
- Filament
- Nozzle temperature 215 for first layer, 190 for subsequent layers
- Filament Overrides
- Wipe while retracting
- Filament
- Printer Settings
- Extruder 1
- Lift Z 0
- Extruder 1
Ironically one of the solutions to stringing is to increase the Lift Z parameter, but I found that the stringing was almost completely gone when I set it to zero. It is essentially ironing every single layer, and it really improves the disc quality.
Setting the perimeters to 4 and having no infill work together to simplify the extruder path so it doesn’t need to jump around, which would create more opportunities for stringing. Every time the extruder moves discontinuously to a new location (e.g. stops extruding and moves) it creates the possibility for stringing. With 4 perimeters and no infill it moves only once or twice per layer on most discs. Before this change it moved a bunch of times on each layer, creating a string from each one.
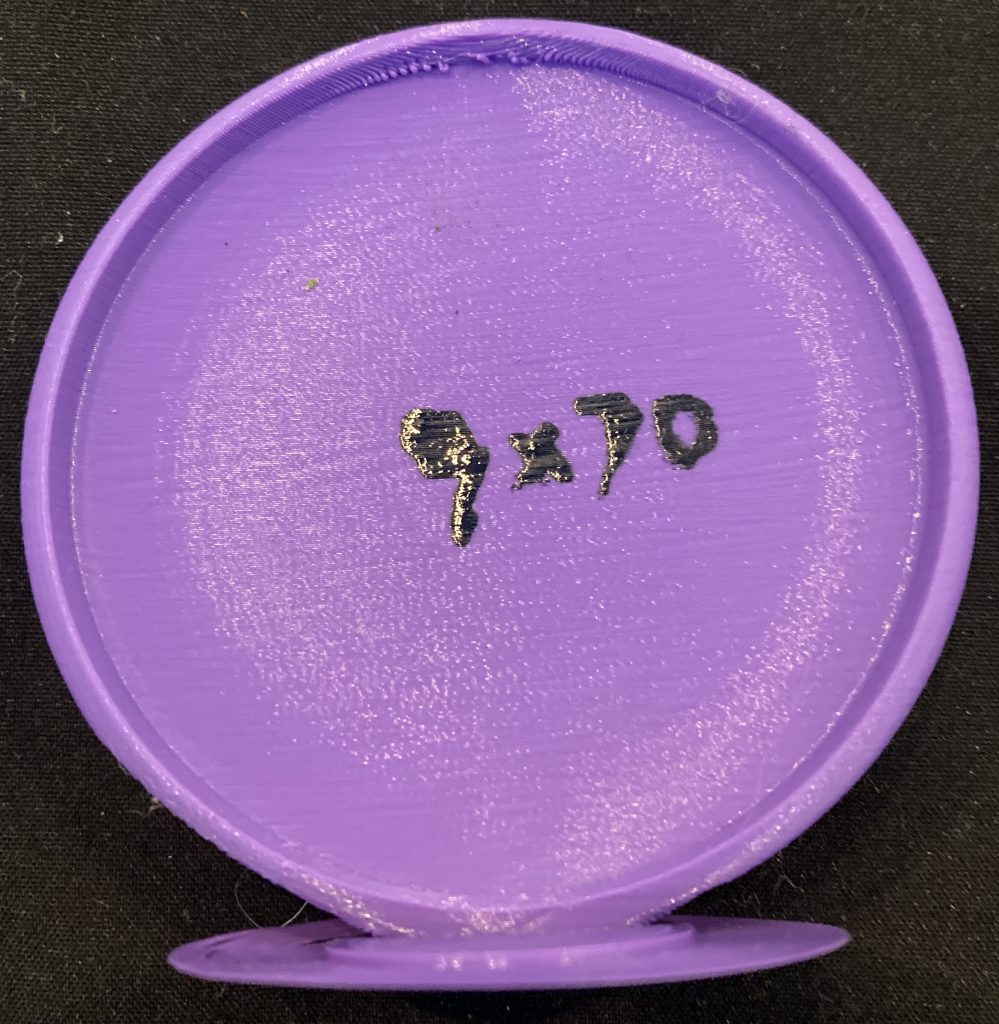
Below is the same 3D model, sliced as above (printed on the same printer with the same filament):
Below is a 14 minute video that talks about how I print small golf discs. It covers the print base, slicer settings, and how to avoid hairy discs.
Scaling Discs
Scaling discs in height can change their flight characteristics considerably. I printed a disc 8 with 110% Y scaling, which made the disc “thicker”. It flew more like a putter, and it weighed more which made it fly differently – less affected by orientation and more ballistic.
I found that the Flexie disc, at 70mm diameter and 8.3mm high with a 1.25mm skin weighing in a 5.6 grams, flies best and most resembles a traditional golf disc when it is thrown in still air. Its flight can be shaped by hyzer angle, velocity and angle of ascent, just like its larger cousins.
But, the Flexie is the worst outdoors. It is just too lightweight. The same disc design with a 3mm skin thickness weighs in at 13.65 grams and it works even in a bit of a breeze outdoors. A big wind will always throw these little discs around, even the Sabre. But, it was best in a bigger wind.
Printing Multiple Discs
I was never able to print more than one disc at the same time. The problem is that the top layer of one disc cools while the same layer is printed on the other discs. By the time the extruder returns to a disc for its next layer the plastic has cooled enough to be hard.
If the 3D printing process was utterly perfect, this would not matter. But, it isn’t. While the zero-Z-lift approach mostly irons the top and prevents any parts from sticking up above the top of the layer, sometimes there can be a bit of plastic on the extruder that sticks to a print when the print head is moving away. Even a remarkably small bit of plastic above the layer means that the next layer laid on top of it pushes on the disc, breaking away the print base.
If a disc wobbles because the print base has partially separate, that is a disc that will never finish printing. Stop it immediately because it can only get worse and worse.
Printing discs one-at-a-time ensures that the top layer is still hot and pliable and the extruder simply irons over any imperfections.
So, I print discs one-at-a-time.
Print Post Processing
After the print has finished and you have removed it from the print bed you will need to remove the print base and clean up where it overlapped the disc.
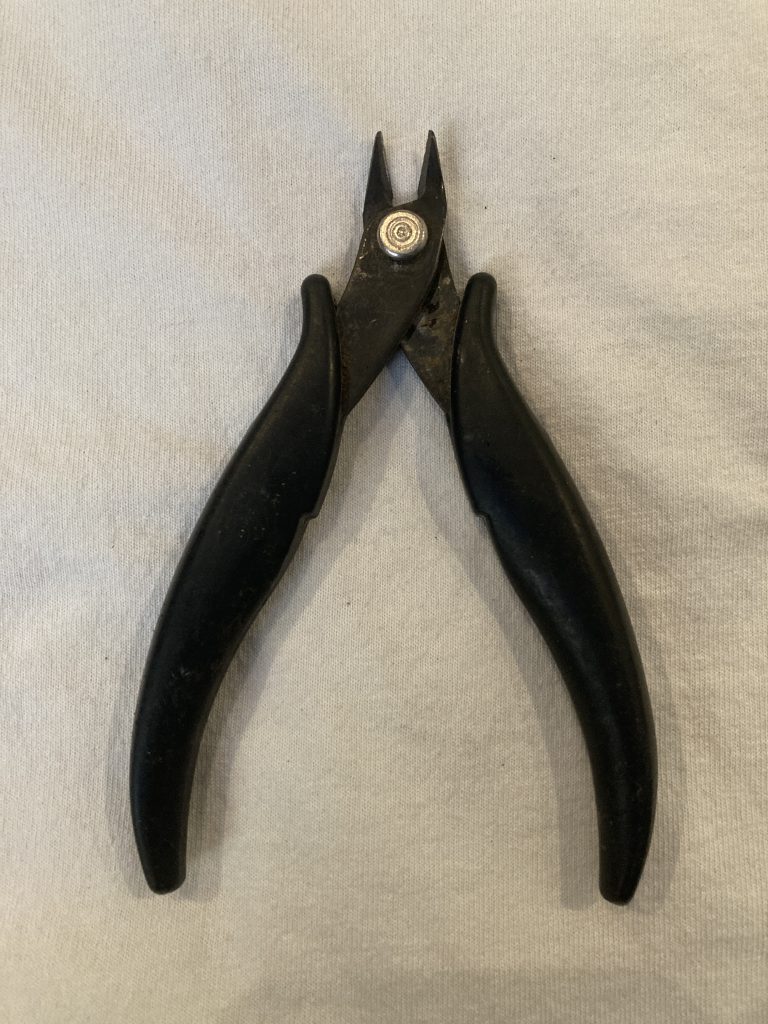
For most discs you can just bend the print base back and forth a few times and it will break off. If it seems extra stiff you may need to use a small wire cutter to cut the print base next to the disc.
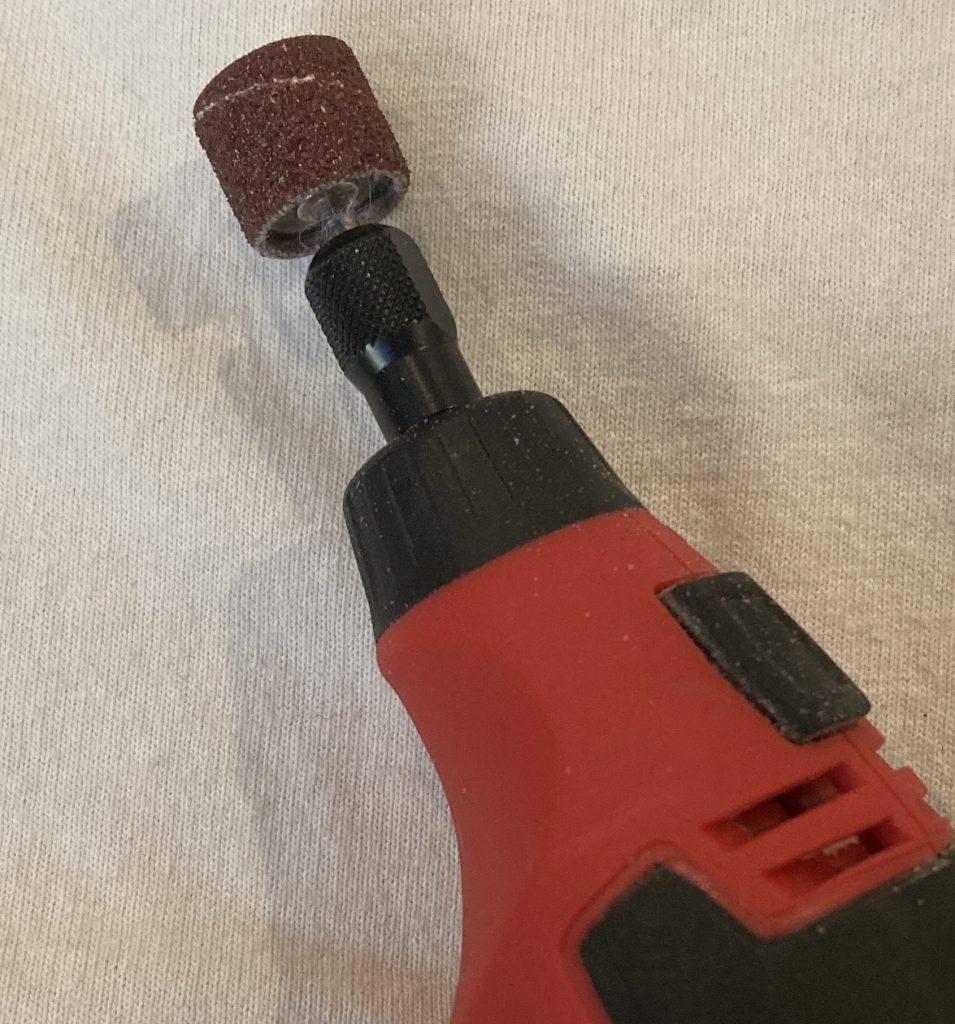
I clean up the excess plastic using a small rotary tool with a sanding drum. I use the very lowest speed and a very light touch to avoid overheating the plastic.
Materials
I’ve been printing discs using PLA but I think PETG would be better because the discs would be stronger. All of my 1.25 and 1.5mm discs eventually crack, but superglue fixes cracks without adding a lot of weight. Thicker discs don’t crack very often.
My friend Damp Rabbit tried to print discs in TPU and they didn’t fly well.
I think the ideal disc has a thin skin so the weight is reduced. The lower the weight the more aerodynamics affect the flight. If you want discs to go exactly straight then heavier is fine, but if you want to shape your shots the disc’s weight works against your efforts.
I tried printing in Silk PLA (also Overture brand, like the purple and orange PLA I’ve been using). But, it didn’t work very well using precisely the same gcode.
I found a wonderful video by Angus Deveson (Makers Muse) with some important suggestions about retraction and stringing: https://www.youtube.com/watch?v=XZTBSJAswbs.
I also printed a temperature tower and found that my best results with the Overture Silk PLA were at about 190º C nozzle temperature with at least 215ºC for the first layer. My Locyfens Rainbow Silk PLA required a 215ºC first layer and 190º for the other layers. I use temperature towers to find the best temperature for my printer for whatever filament I’m using.
Videos
Disc Library
There is a separate Disc Library page.
If you’d like to contribute discs for others to use, please send me a URL to a page where you describe them and where people can download a .step file for them. I’ll include your URL here (until I contrive a better way to include content, this will have to do). You can send submissions to hoco atsign smalldiscgolf point org.
Next up: Printing a Topple Target